Quick Start
This guide will help you get started on turning your camera into an IP Security Camera!
Key Steps Overview
- Flashing your camera with OpenIPC
- Setting up your camera for the first time
- Setting up Majestic
- Additional Resources
Note: You might need to solder to flash your camera, This might not be easy for the average Joe.
Hardware Requirements
-
Camera: A camera with a supported SoC
-
FTDI Adapter: Essential for the flashing process.
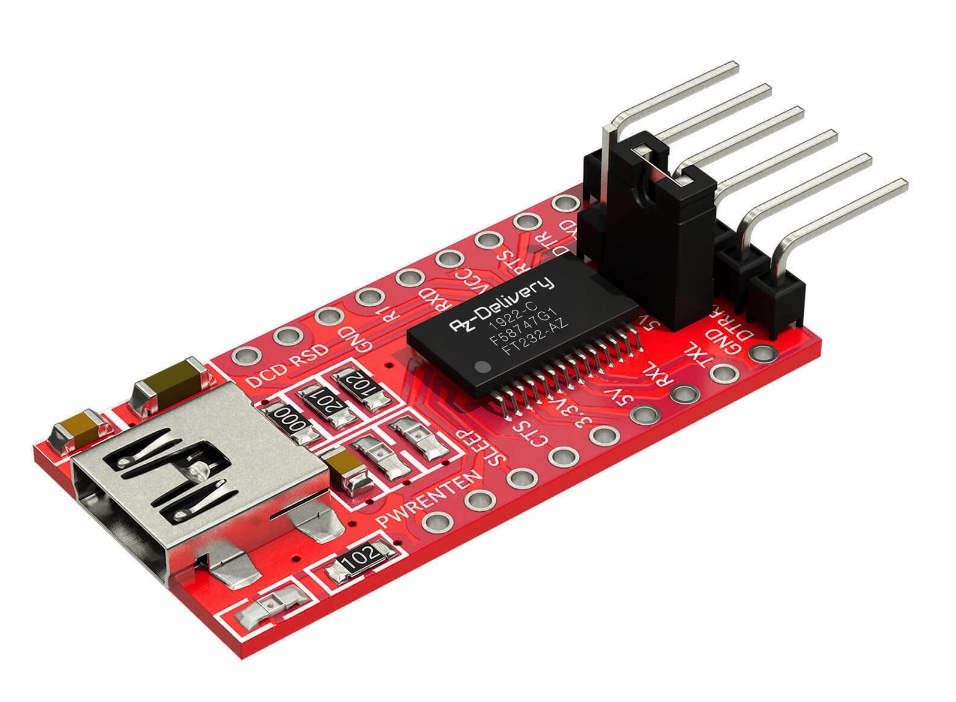
-
Additional Supplies: Wires and a soldering iron.
Note: This is all the basic requirements needed for a basic IP Security Camera.
Step 1: Flashing your camera with OpenIPC
Step 1.1: Flashing the Camera
- Connection Points: Identify the UART connection points on the camera board.

- Using FTDI Adapter: Connect the camera to the FTDI adapter for console access.
- Flashing Process: Use console commands to flash the OpenIPC firmware onto the camera.
Note: If you get garbled output or no output, Try flipping RX and TX.
Step 1.2: Setting up Serial Terminal Emulation
- MacOS Instructions: Utilize built-in commands to establish a connection.
- Windows Instructions: Install and use PuTTY for serial terminal emulation.
Step 1.3: Setting up a TFTP Server
- MacOS: Activate the built-in TFTP server.
- Windows: Install a TFTP server application, such as SolarWinds.
Step 1.4: Getting the Correct Firmware Image
- Download the appropriate OpenIPC firmware for your camera’s SoC.
Step 1.5: Opening a Console and Flashing the Camera
- Boot the camera while connected to the serial console and flash the firmware.
- While plugging in the camera, You may have to hold Enter to enter the bootloader.
- Follow the provided commands from the firmware download page.
Step 2: Setting up your camera for the first time
- If you have trouble getting in, Use ‘root’ for the username and ‘12345’ for the password.
- You will be asked to set the password and be given the option to put the web interface into dark mode.
- Make sure to use a secure password!
Step 3: Setting up Majestic
- Due to major changes to the web interface at this time, This information is not available at the moment.