Advanced setup guide
General info
This article will guide you through the process of advanced VTX setup such as upgrading, connecting to a computer, changing settings, etc. This article will guide you through the process of advanced VTX setup such as upgrading, connecting to a computer, changing settings, etc. If you want to quickly jump to a specific instruction, use the menu on the right side of the screen
What you need
- A PC(Windows, Linux, macOS).
- Ethernet jack on PC(can be USB-Ethernet dongle).
- OpenIPC-FPV VTX and something to power it.
- OpenIPC Companion for your OS.
Connecting VTX to a computer
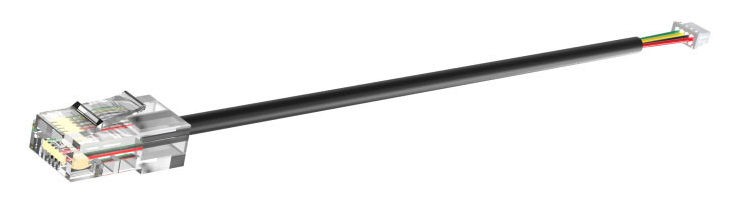
- Connect Ethernet cable(or USB debug port if you are using Mario AIO) to your VTX.
- Power on your VTX using battery or USB debug port.
- Connect another end of Ethernet cable(or USB debug port) to your PC.
- Set up wired network connection on your PC(use the menu on the right side of the screen to quickly navigate to needed item)
- Connect to VTX using OpenIPC Companion with this credentials.
| IP | Password |
|---|---|
| 192.168.1.10 | 12345 |
OpenIPC Companion tabs
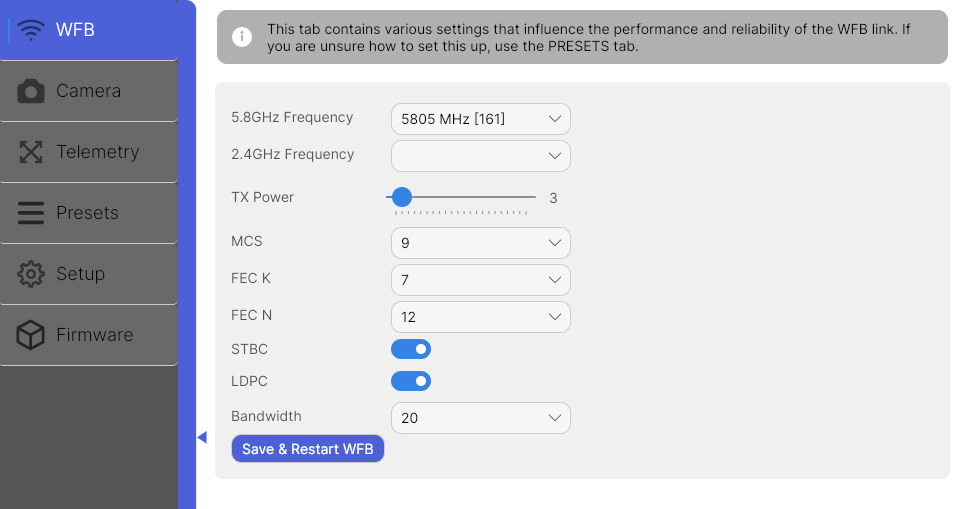
WFB
This is tab for WFB-ng setup. DO NOT change any settings if you don`t know what are you doing(except frequency). Please use presets for that.
Camera
Tab for camera setup. It is not recommended to change settings if you don`t know about them. Please use presets for that.
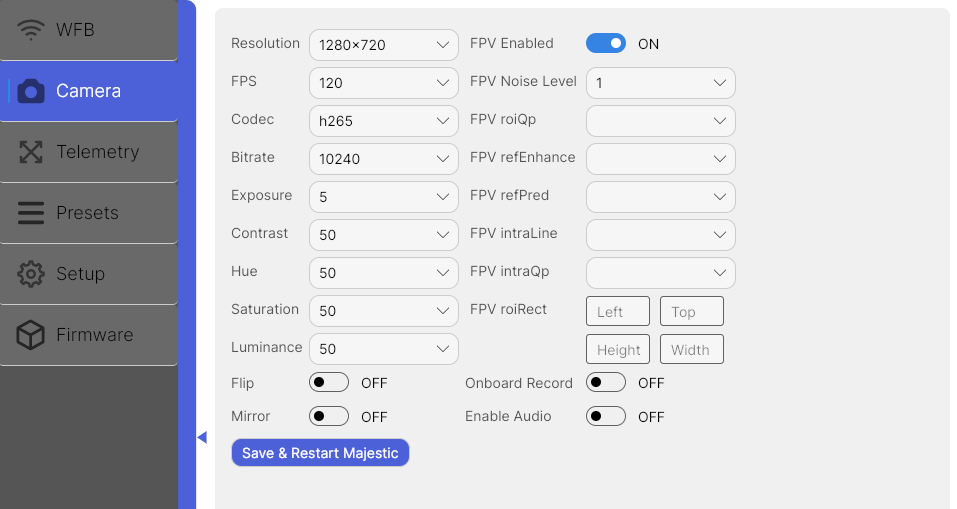 Here you can flip or mirror your image, turn on onboard recording, enable or disable audio.
Telemetry
Tab for telemetry and OSD setup. DO NOT press Enable 40MHz if your net card don`t support this mode. Your net card model is displayed above(on photo - 8812eu), then you can check which modes are supported on your net card here on docs.
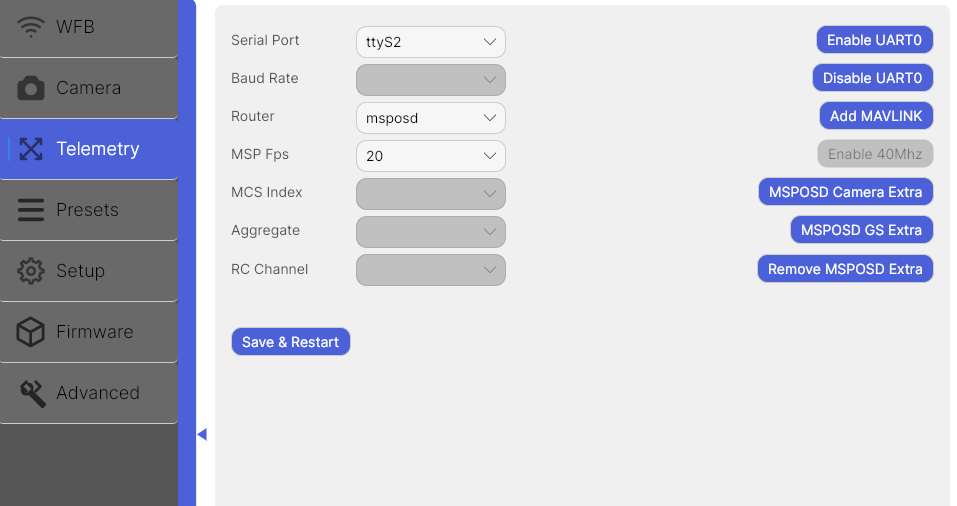 Select msposd as router if you want OSD, on FC side you need to enable displayport on UART.
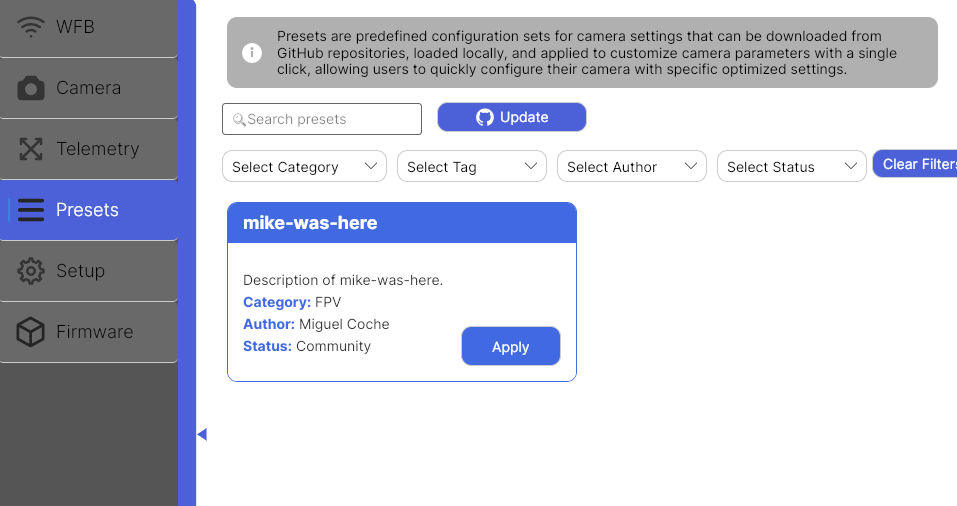
Presets
Tab where presets can be found. Before use - click update button. Presets are similar to Betaflight presets.
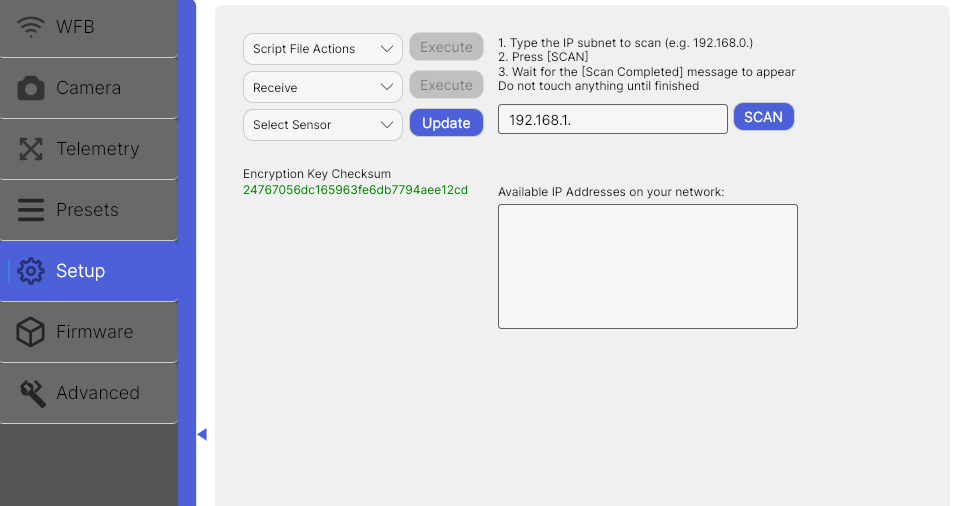
Setup
Tab where you can change sensor.bin, receive or transmit keys to or from VTX or VRX or you can scan your local network for IP addresses.
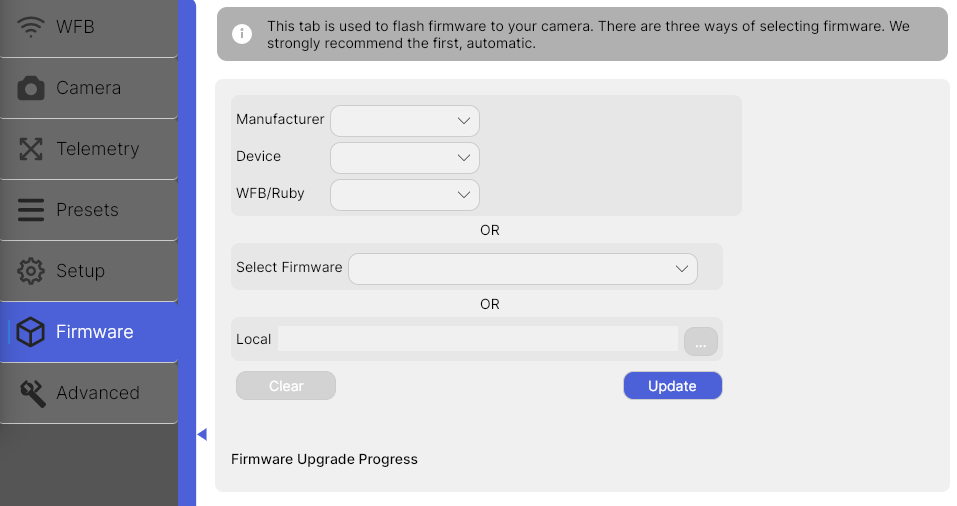
Firmware
Tab for updating firmware on your VTX. You can chose to use device picker if you do not know what firmware you need to install or you can use firmware picker to select needed firmware to install(correct firmware is mentioned in device`s article) or you can install local firmware if you want.
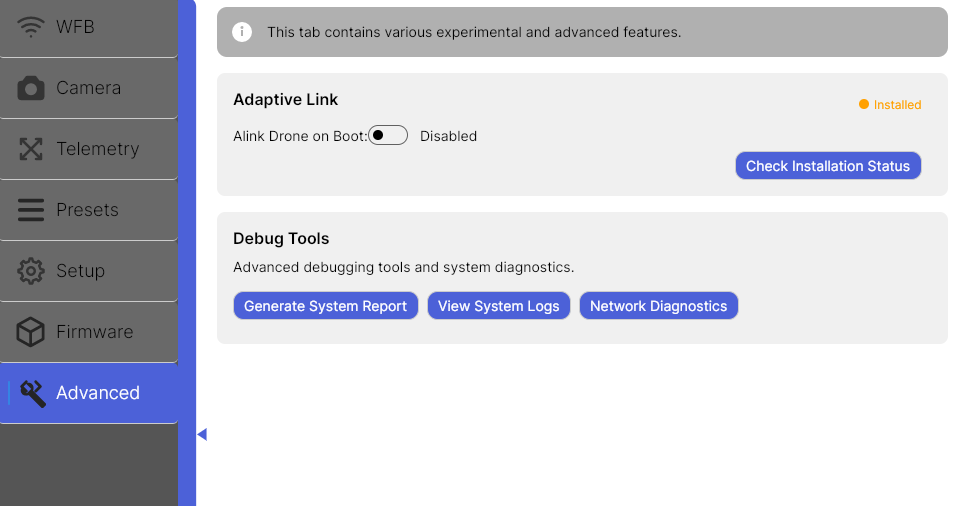
Advanced
This tab contains various experimental and advanced features. Use on your own risk.
Ethernet configuration
Windows
- Connect your VTX to your PC`s Ethernet port with the Ethernet cable(or USB debug port).
- Open up a windows file browser, scroll down on the left bar and left click on Network, select properties.
- Select change adapter settings
- Double click on Internet Protocol Version 4
- Enter numbers exactly as seen on image below.
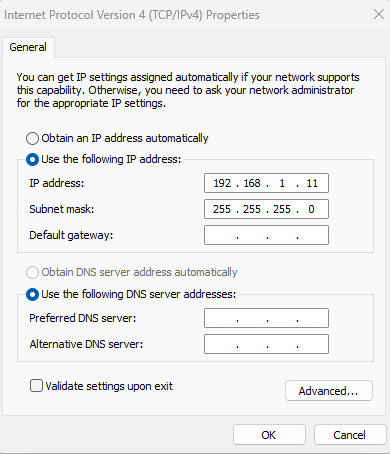
- Done
macOS
- Open Settings.
- Continue as in the screenshots below.
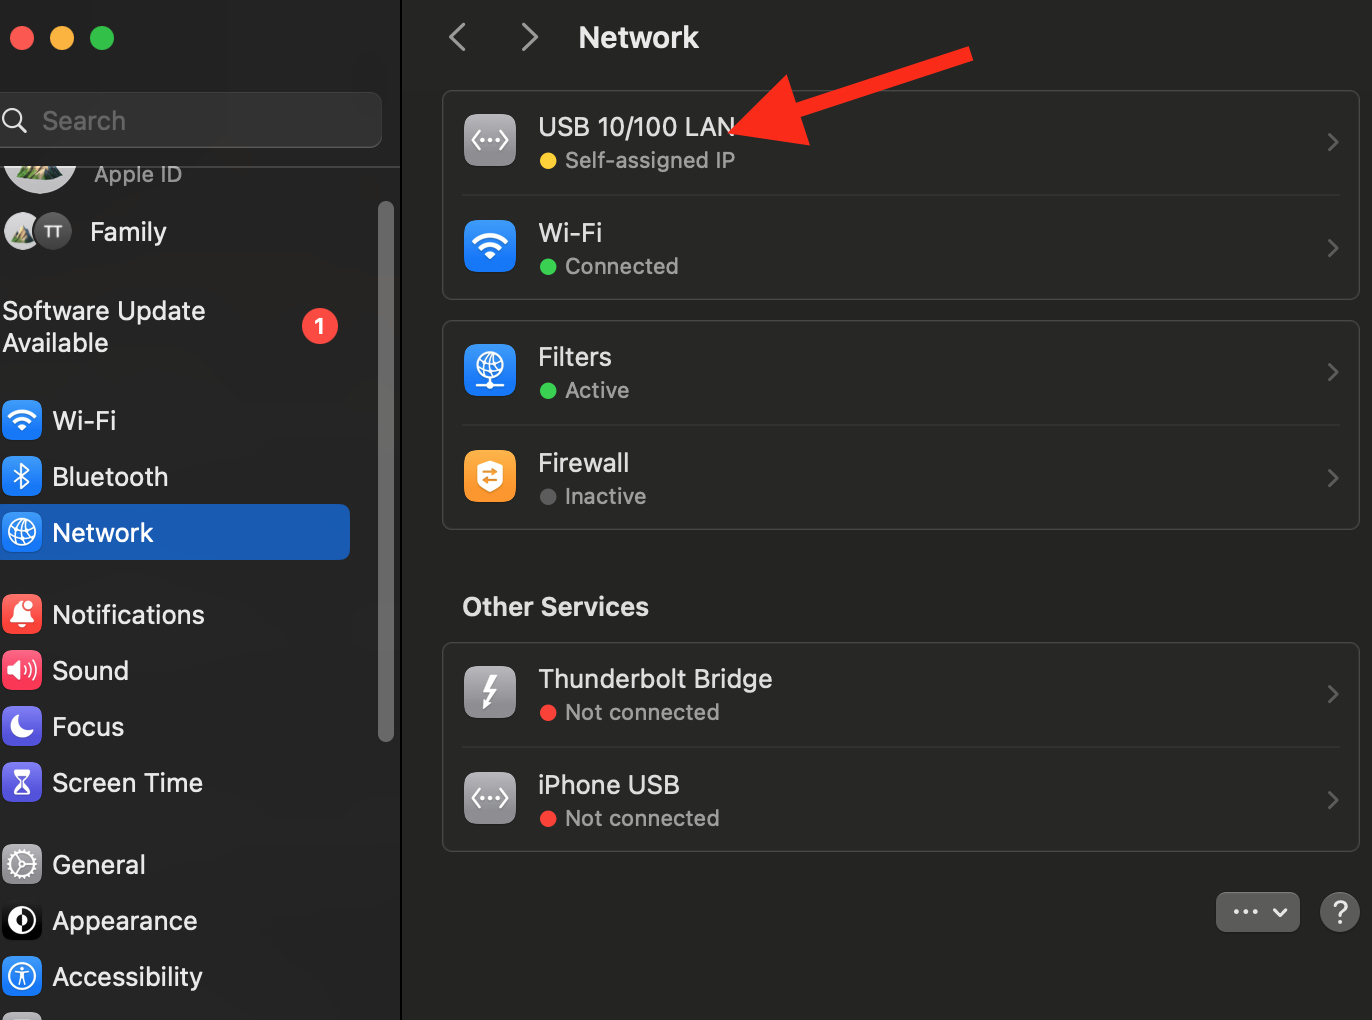
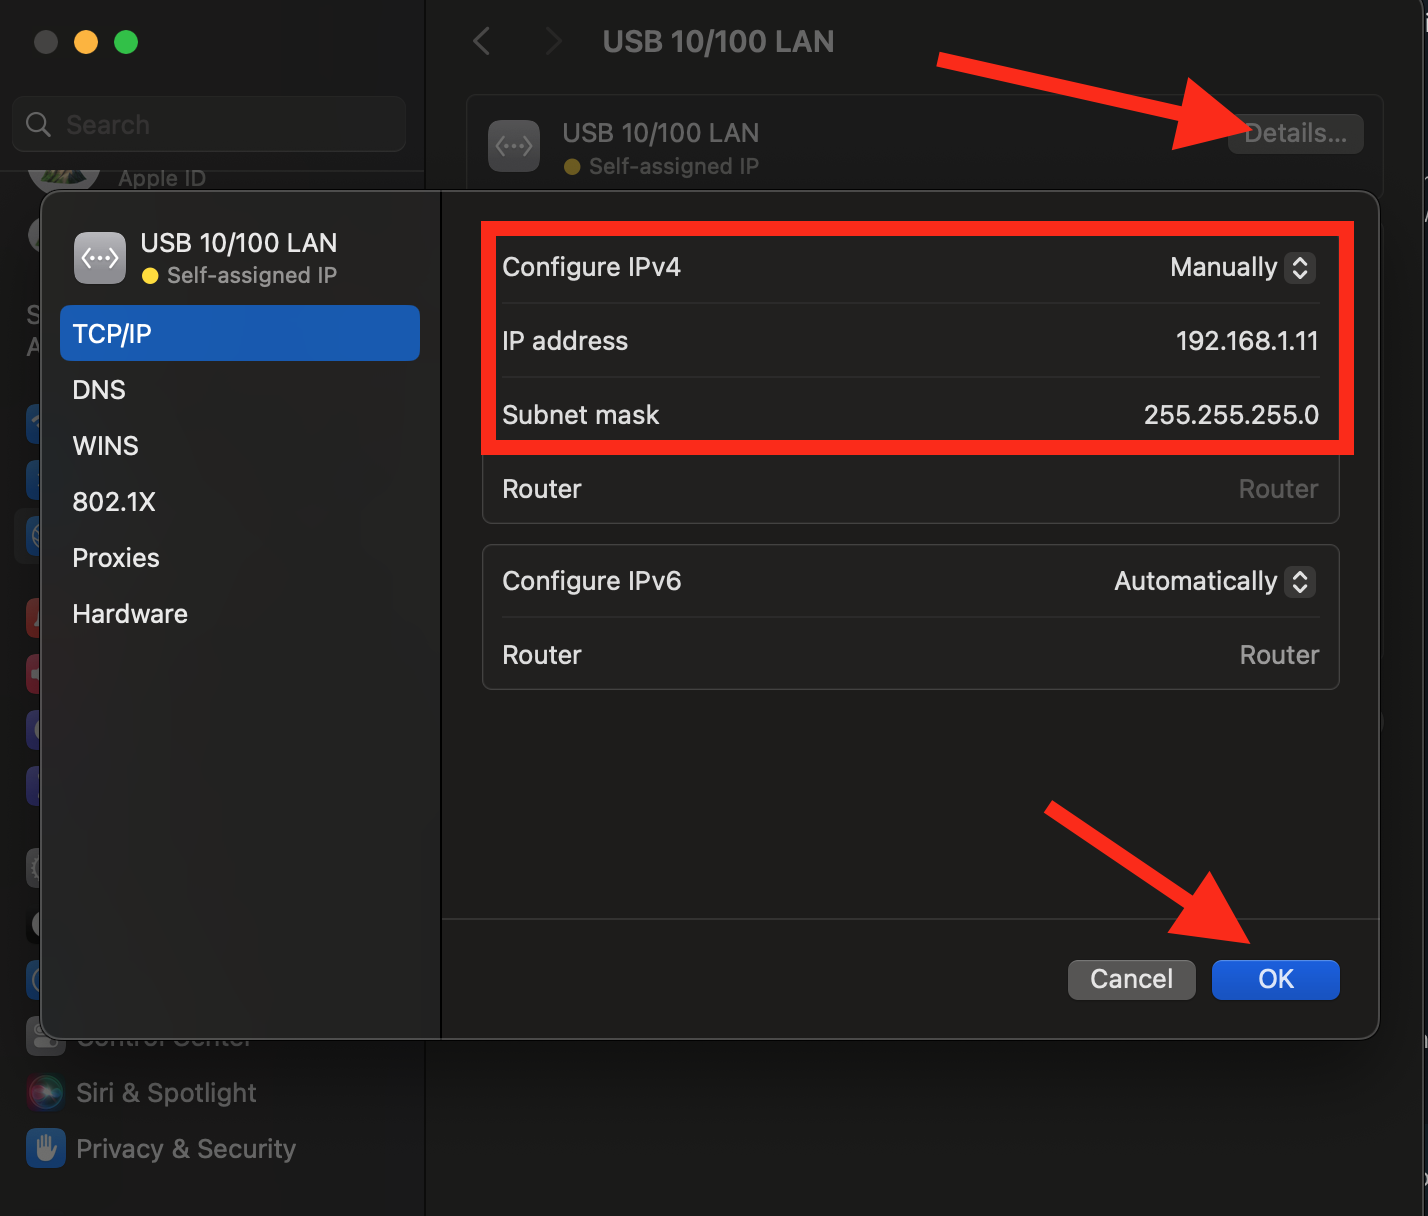
- Done