A Step-by-Step Installation Guide
This guide is designed to provide a detailed walkthrough for setting up an FPV (First Person View) system using OpenIPC. It is structured into several key steps, from hardware setup to software configuration.
Key Steps Overview
- Flashing the Camera and Groundstation with OpenIPC
- Connecting Additional Hardware (WiFi Adapters and BECs)
- Generating and Installing Key Pairing for WFB-NG
- Configuring
wfb.conffor Optimal WiFi Channel - Setting up
vdec.confon the Groundstation - Adjusting the
majestic.yamlFile on the Camera - Testing the Configuration
- Additional Resources: Video Tutorial and Next Steps
Note: The initial steps involve hardware setup, which can be intricate, while the later steps focus on software configuration, involving editing configuration files.
Hardware Requirements
-
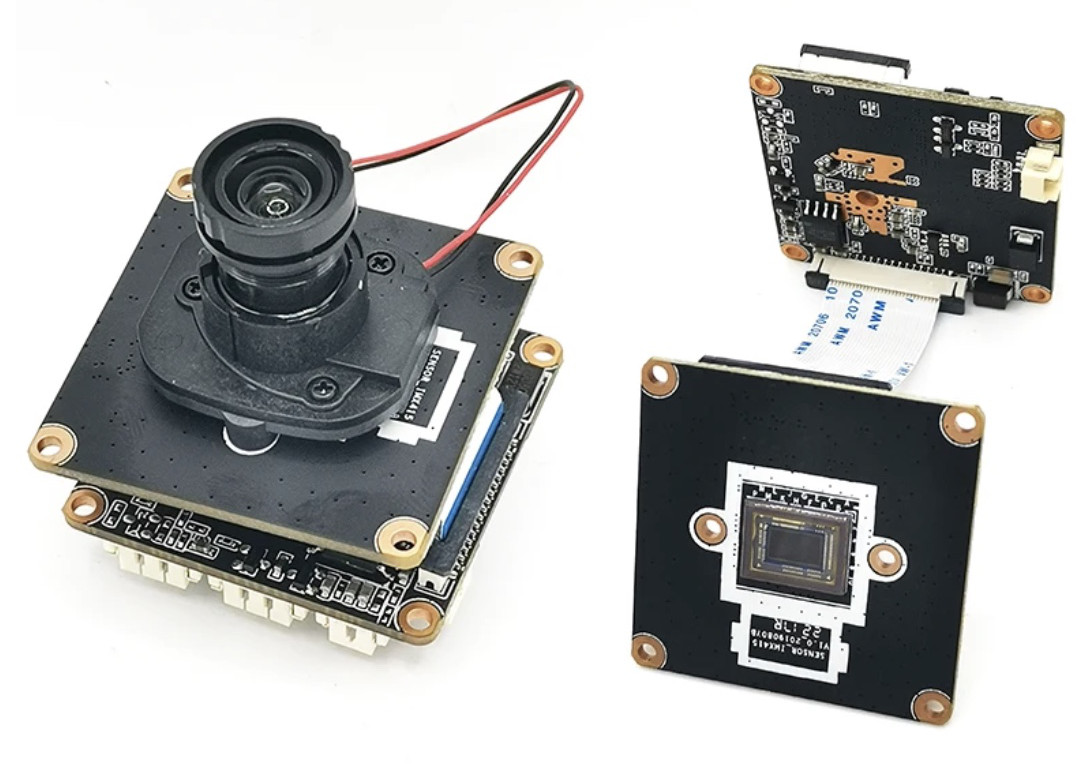
Camera: An SSC338 based board with a Sony IMX415 sensor was used for this guide.
-
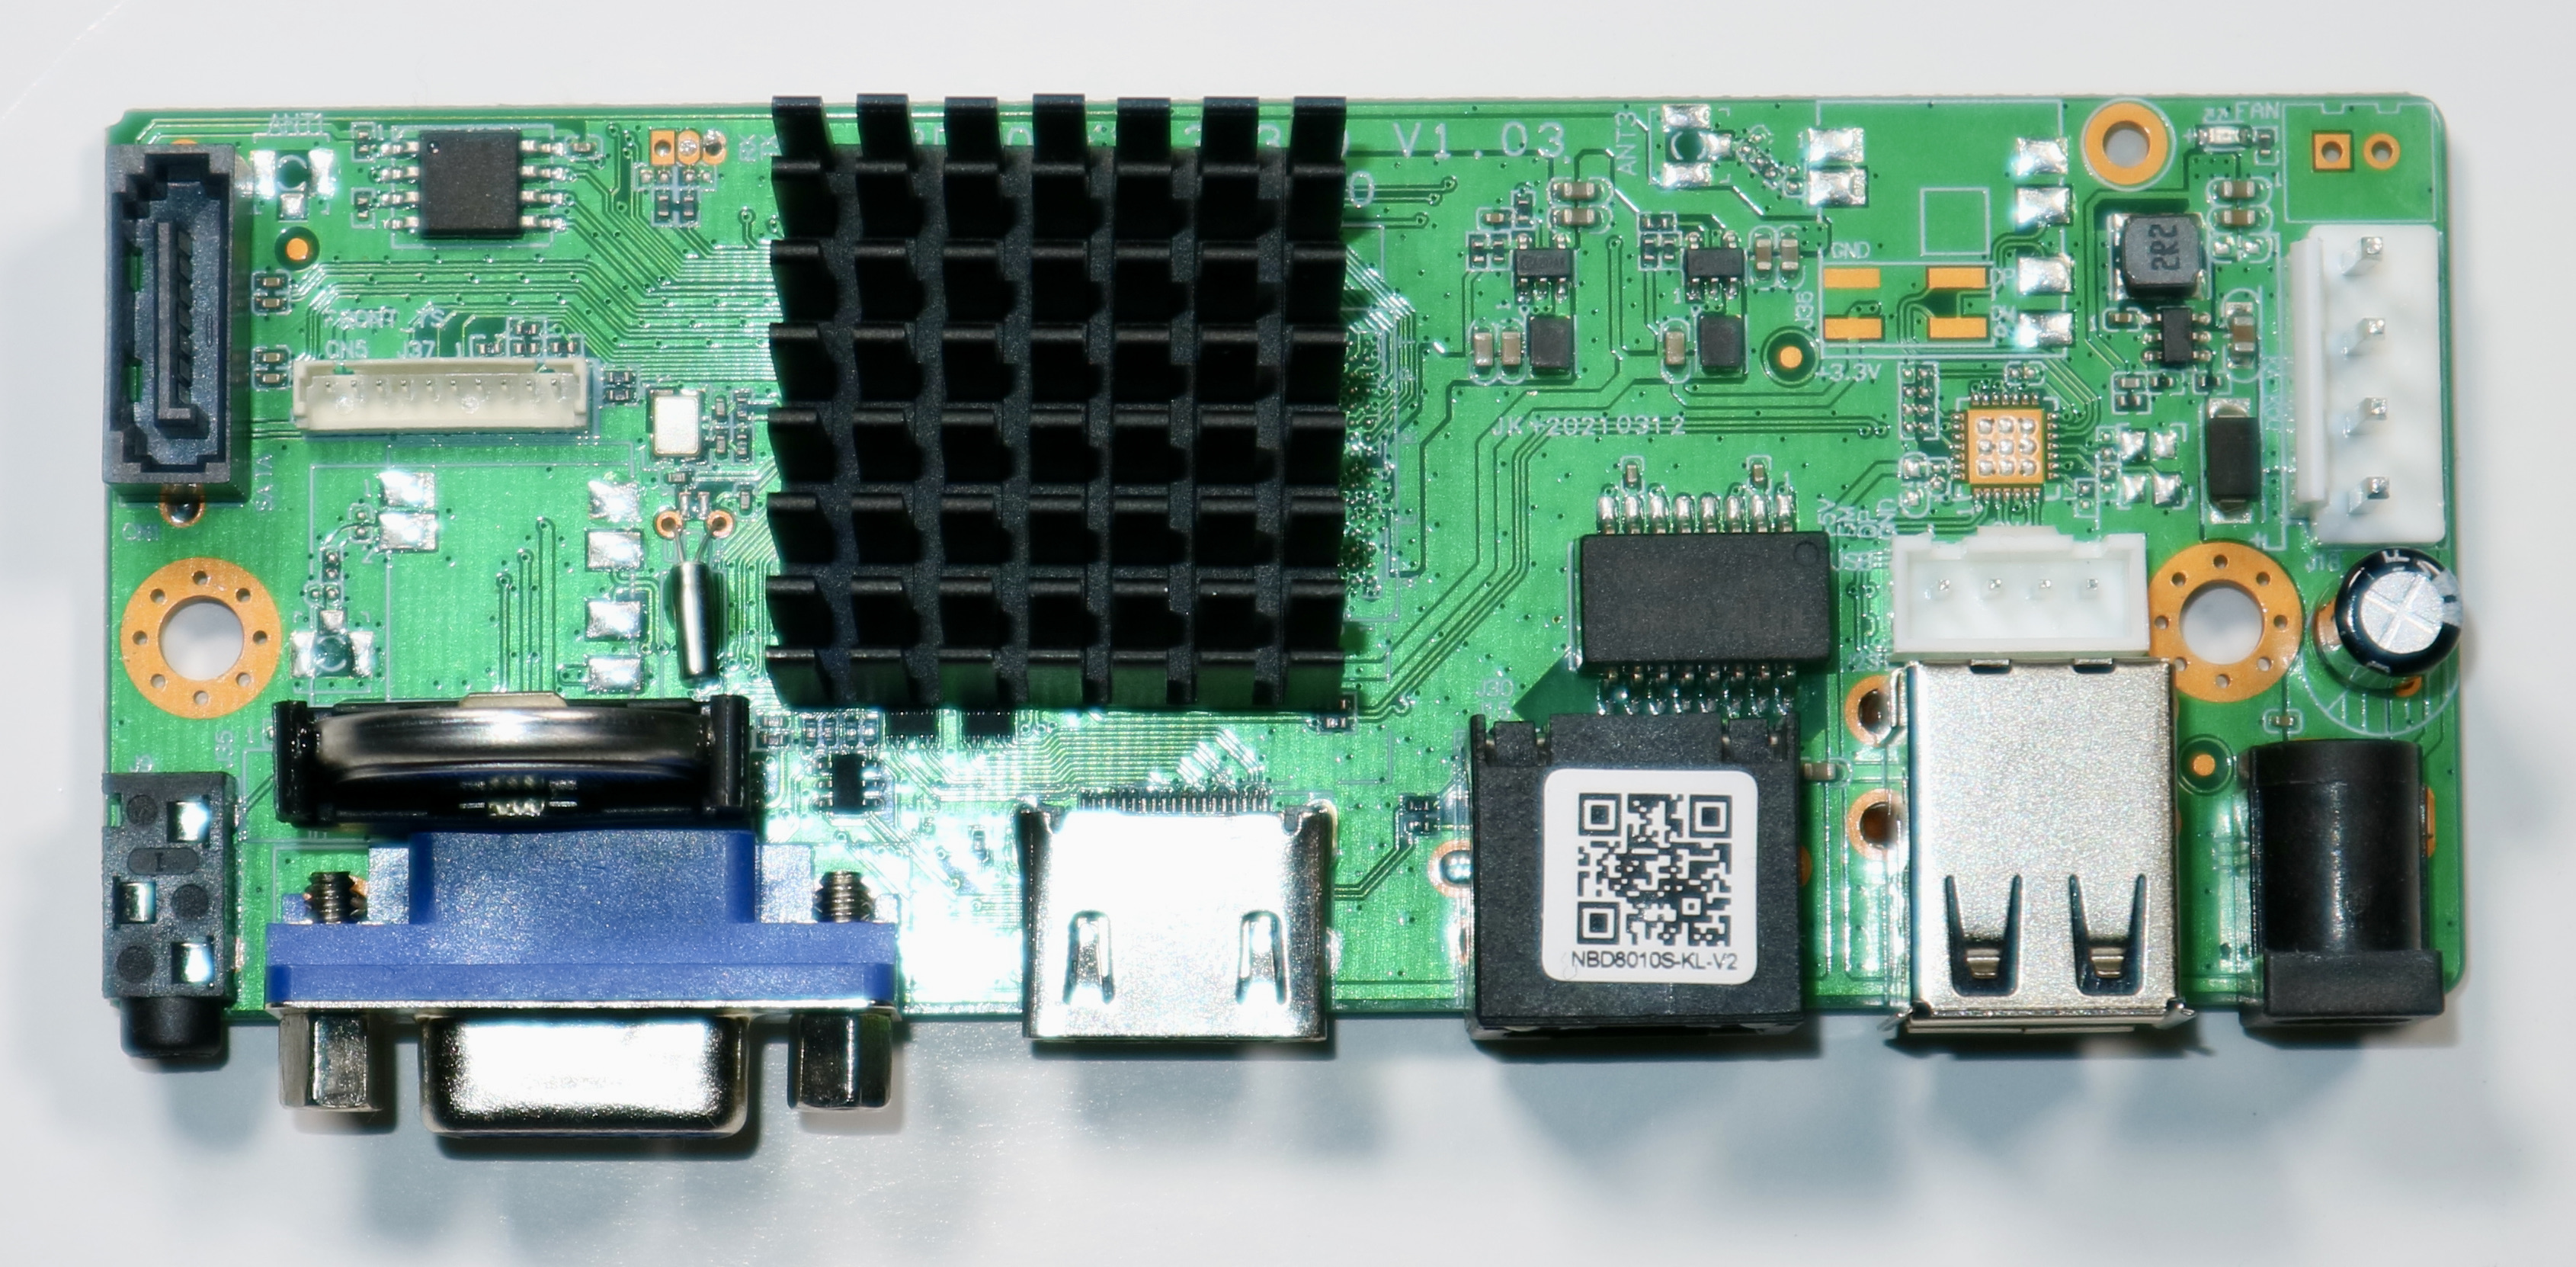
Groundstation: An Nvr board is recommended for its popularity and cost-effectiveness.
-
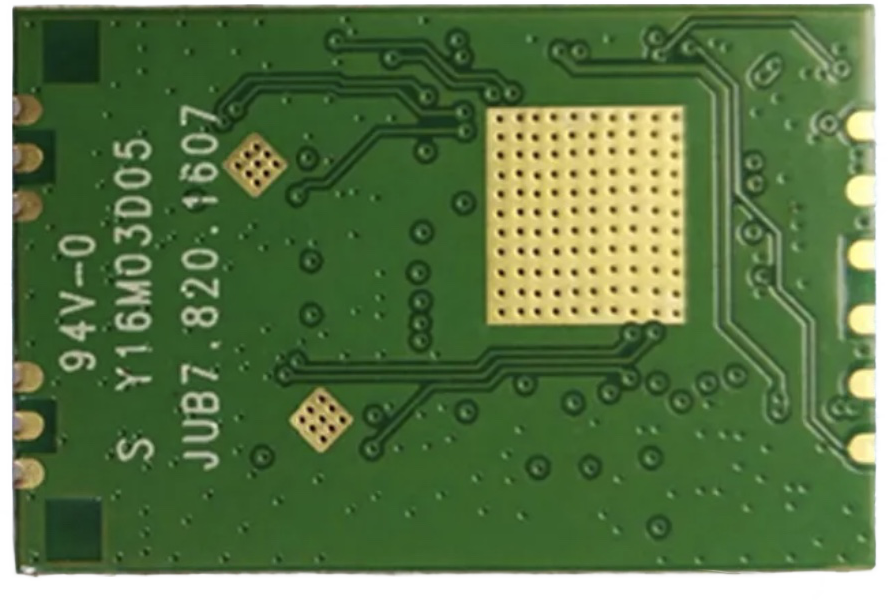
WiFi Adapters: RTL8812AU modules are a good choice.
-
BECs: These are used for voltage regulation.

-
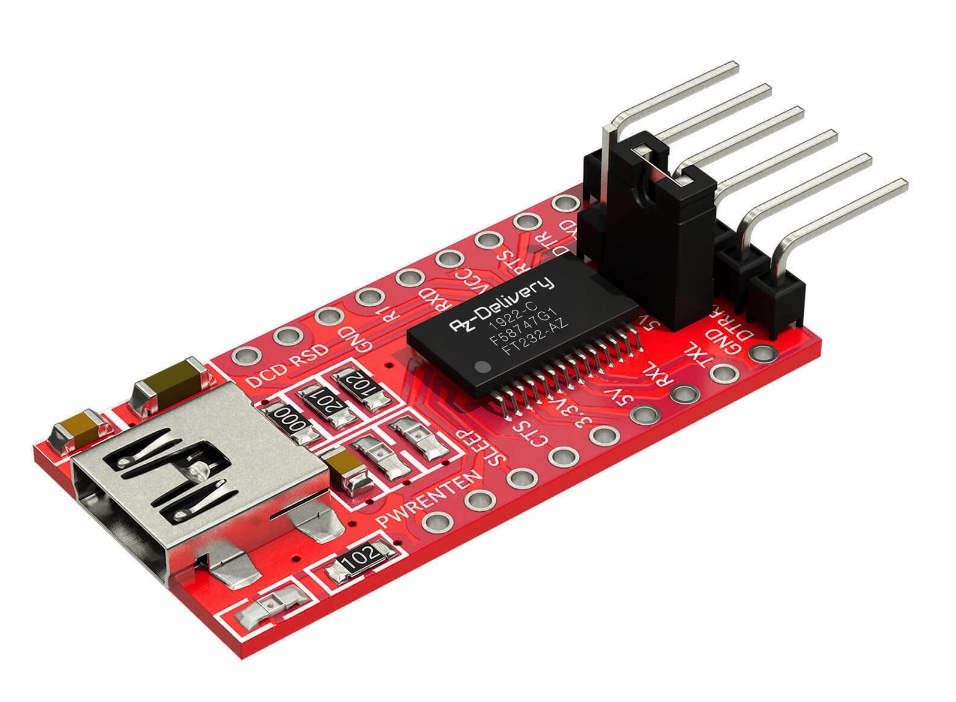
FTDI Adapter: Essential for the flashing process.
-
Additional Supplies: Wires, soldering iron, power connectors (e.g., XT60).
Step 1: Flashing the Camera and Groundstation with OpenIPC
Step 1.1: Flashing the Camera
- Connection Points: Identify the UART connection points on the camera board. Some people solder wires to them, some just use needles, glue and common sense.

- Using FTDI Adapter: Connect the camera to the FTDI adapter for console access.
- Flashing Process: Use console commands to flash the OpenIPC firmware onto the camera.
- Flasing guide for SSC30KQ camera
Step 1.2: Setting up Serial Terminal Emulation
- MacOS Instructions: Utilize built-in commands to establish a connection.
- Windows Instructions: Install and use Putty for serial terminal emulation.
Step 1.3: Setting up a TFTP Server
- MacOS: Activate the built-in TFTP server.
- Windows: Install a TFTP server application, such as SolarWinds.
Step 1.4: Getting the Correct Firmware Image
- Download the appropriate OpenIPC firmware for your camera’s SOC.
Step 1.5: Opening a Console and Flashing the Camera
- Boot the camera while connected to the serial console and flash the firmware.
- Change the camera’s root password for security.
Step 1.6: Flashing the Groundstation
- Repeat the flashing process with the groundstation NVR board.
- Utilize an HDMI connector for additional display options.
Step 2: Connecting Additional Hardware (WiFi Adapters and BECs)
- Connect WiFi modules to the camera and groundstation.
- Use BECs to regulate voltage for the WiFi modules.
For example, if you use SSC30KQ as the camera SOC and BL-M8812EU2 as a network card, you need:
- Single or multiple BEC for your target battery voltage to power both the camera and the network card (they work from 5v), common options are mini560 for batteries up to 4s or mini560pro for 6s. Add high-quality low-ESR capacitor to the output of the BEC (for example genuine Panasonic, they are not so expensive), use twice the BEC voltage (10v), capacity 200-300, can have two parallel. Having a capacitor increases signal quality a lot (due to complex wifi modulations being sensitive to the input voltage quality). If one BEC can’t handle the current then use separate ones, test the current consumed by your setup with a current meter or smart charger.
- Use the two pins (GND and 12V) on the camera from the big ethernet+power connector to power it (analog camera cable works just fine).
- Solder 3 cables to the USB pad (or use the socket if there is one) - GND, D+ and D- and connect them to the GND, D+ and D- on your wifi card (see the card wiring, it’s 2, 3 and 4 pins there for EU2). Connect GND to GND, D+ to D+, D- to D-. Twist the wires well.
- Make sure you have the antennas connected.
- Power the WiFi card from the same (or separate) BEC, use pins 6 and 7 for +5V for the EU card (they are equal, you can use one or two positive and one or two ground wires to be safer), connect the grounds, twist the wires.
- Add a heatsink to the wifi card, then either add a small 30x30 fan to the heatsink or use bench fan if you mount it on the drone where it gets cooled by the air. The wifi card gets really hot even on minimal power, on high power it gets destroyed very quickly without any protection. You glue the heatsink to the back side of the board (one with many square ground pads), not to the one with the ground cage. Don’t power it on without a heatsink.
- Check the whole system for shorts, check if the antennas are connected and power it on. Assuming you have already configured it (channel, bandwith, codec) - you should see the signal on your GS now. Monitor the system temperature, cool if needed.
- For the telemetry use second UART pins (usually AF_RX & AF_TX), connect them to the FC (RX->TX, TX->RX) and configure the port to output MSPOSD or MSP+DisplayPort - it should be working from the box.
Note: Ensure proper soldering and connections for stable operation. Always attach antennas to the WiFi modules before powering them on. Do not overheat.
Step 3: Generating and Installing the Key Pairing for WFB-NG
- Currently both groundstation and vehicle side firmware have the same default key set, so you don’t have to generate your own for it to work from the box.
- If you want your own encryption keys - generate them using the
wfb__keygencommand. - Transfer the
drone.keyto the camera andgs.keyto the groundstation.
Step 4: Editing wfb.conf to Set the Correct WiFi Channel
- Configure the WiFi channel in
wfb.confto match your hardware capabilities. - Consider channel compatibility and local regulations for optimal performance.
Step 5: Configuring vdec.conf on the Groundstation
- Update
vdec.confto match the video codec and format used by the camera. - Ensure consistency in settings between the camera and groundstation.
Step 6: Configuring the majestic.yaml File on the Camera
- Adjust settings in
majestic.yamlto define video streaming parameters. - Align these settings with those expected by the groundstation’s
vdec.conf.
Step 7: Testing out the Configuration
- Power up the camera and groundstation to test the video stream.
- Troubleshoot any connectivity or streaming issues.
Step 8: Video Tutorial and Next Steps
- Access a comprehensive video tutorial for visual guidance.
- Explore further configurations and enhancements for your FPV system.