General UART Flashing Guide
How to Flash Firmware via UART
You will need
- FTDI FT232RL
- miniUSB - USB cable
- A few wires
Software
Steps to flash the firmware
-
Open CMD or the Windows Console, enter the command:
Terminal window ipconfig
Locate your IPv4 address.
-
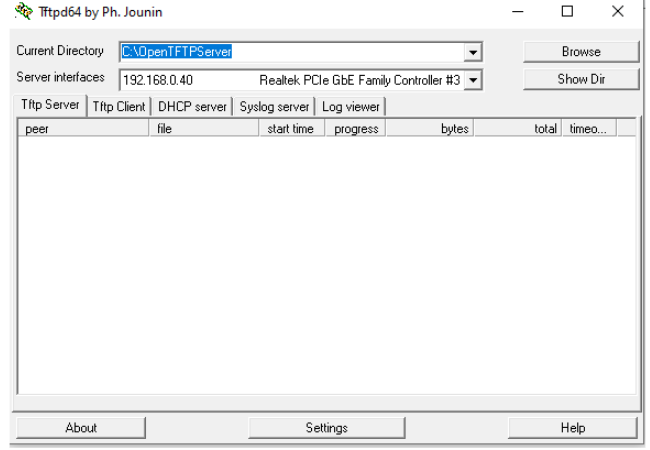
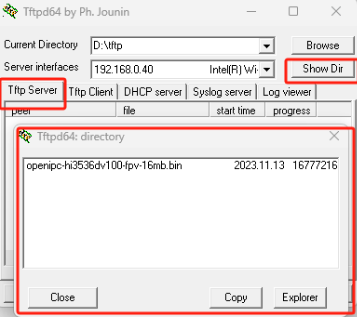
Start Tftpd64:
-
Generate a MAC address, and enter your IPv4 as the TFTP server address.
-
Click Generate Instructions.
-
Check your FTDI wiring:
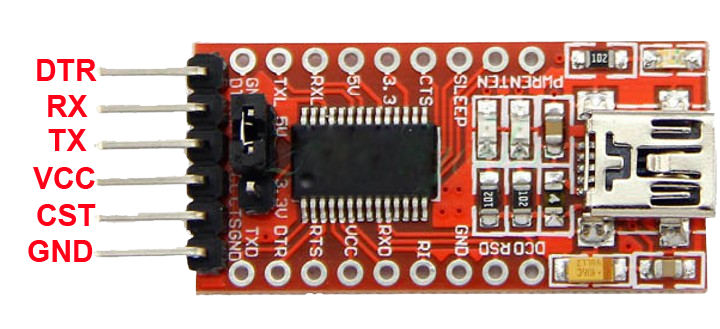
- RX → TX
- TX → RX
- GND → GND
-
Solder the FTDI outputs to the UART pads.
-
Open Device Manager, insert the USB FTDI, and find its COM port.
-
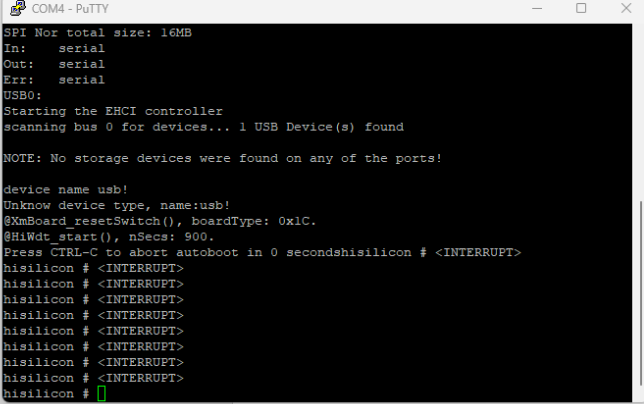
Open Putty with the correct port:
Terminal window putty.exe -serial COM3 -sercfg 115200,8,n,1,N -
The Putty window will open.
-
Connect power to both the FTDI USB and Air Unit.
- If everything is connected correctly, boot logs will appear in the Putty terminal.
-
Go to: https://openipc.org/cameras/vendors/
Select the firmware that matches your device and click “Generate an installation guide”
-
Place the downloaded firmware
.bininto the TFTP folder:
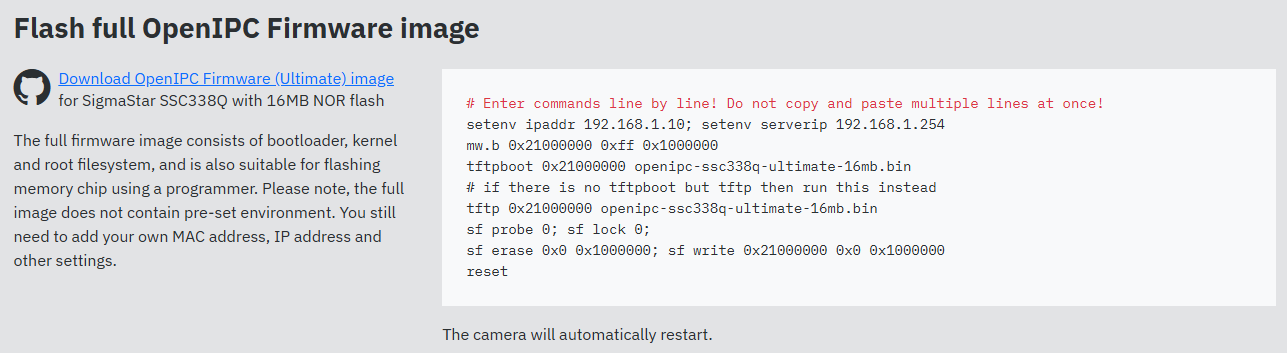
- Follow the instructions line by line (don’t paste multiple lines at once):
- If your download fails after the third command, check the TFTP server settings.
- Example IP setup (if your router is on 192.168.0.1):
- Device IP:
192.168.0.123 - PC IP:
192.168.0.40
- After installing the standard OpenIPC firmware, you can effortlessly flash any compatible FPV firmware using the Multiconfigurator depending on your device.