Runcam WiFiLink 1
Specifications
| Image Sensor | IMX415 |
|---|---|
| Field of view | FOV 160° |
| Power range | DC 9-30V (BEC power supply highly recommended. Non-direct power supply from Lipo battery) |
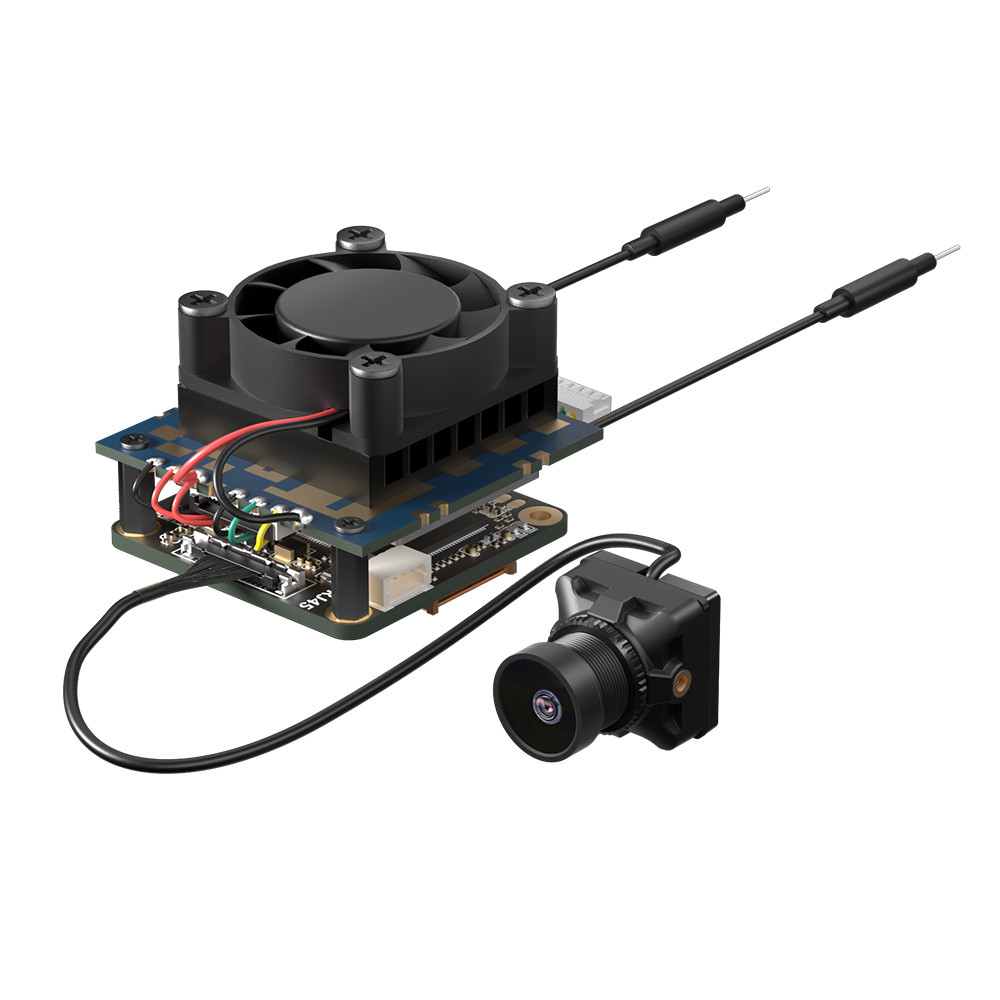
| Lens module size | 19*19mm/M12 lens/MIPI cable 200/130mm (Vista compatible) |
| Mounting hole spacing | 25.5mm*25.5mm |
| PCB size | 30mm30mm(338Q) 32mm32mm(WIFI) |
| Weight | 30g |
| Antennas | IPEX connector |
| PA | 29dBm (800 mW) |
| WiFi chip | BL-M8812EU2 (5MHz, 10MHz, 20MHz) |
| UARTs | 1 |
| SOC | SigmaStar SSC338Q |
| Firmware | ssc338q_fpv_openipc_urllc_aio_nor.tgz |
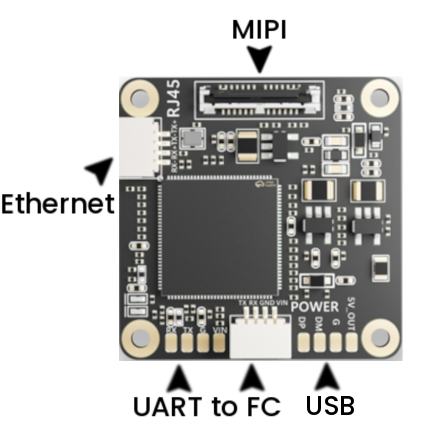
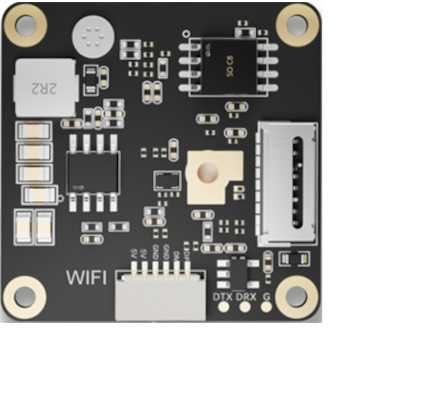
Layout
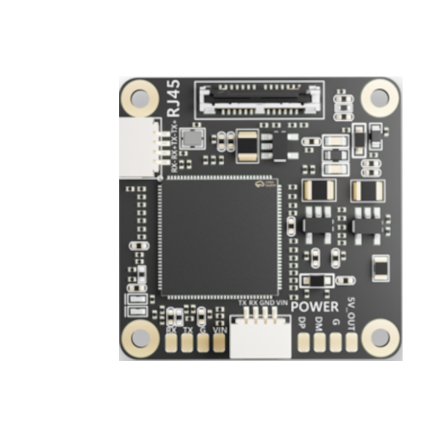
Motherboard up
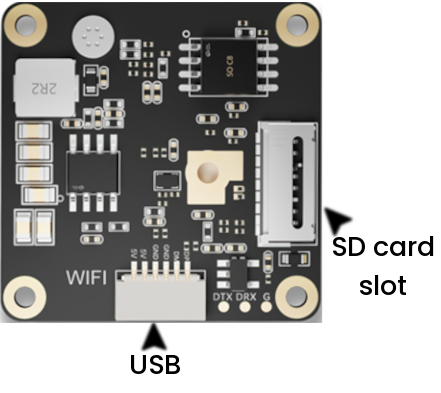
Motherboard down
Basic setup
For advanced setup guide please read this article.
What you need
- Flight controller with betaflight, INAV, Ardupilot.
- Runcam WiFiLink + Pixelpilot
- RTL8812AU wifi adapter (Comes in package if you bought WiFiLink-G)
- USB C OTG adapter (Comes in package if you bought WiFiLink-G)
- A fairly modern Smartphone with Android 13 or 14 installed. The smartphone should have a good processor or you`ll get big latency
- Internet connection
Hardware Setup
-
Connect the antennas to Runcam.
-
Connect the 4 cable to UART on FC dedicated to connecting digital VTX’s(as on image below) or direct solder to UART on FC(you should connect power input to BEC output on FC).
Attention: the cable color codes will match only on one end. Double check your wiring (gnd to gnd, vcc to vcc, etc)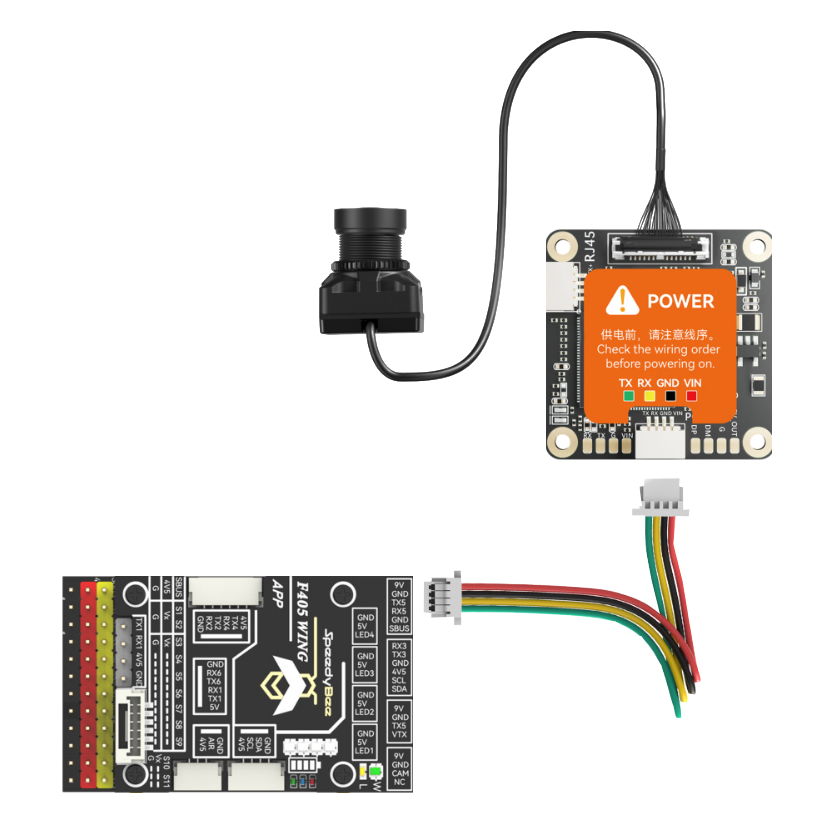
-
Insert a formatted micro SD card into the Runcam. The slot is on the bottom of the unit, when the fan faces up.
-
Connect an Ethernet cable supplied with Runcam to the device.
How to get gs.key?
- Insert an empty, formatted micro SD into the runcam device. The card
pads need to face the board. The slot for the micro SD can be on the ‘inside’ of the board so you might need to disassemble it to put the card in.
- When you first power up your runcam, the device will create a ‘user’
file and a ‘gs.key’ file. Take the SD card out from your runcam and copy the GS.key file into your VRX(android device, PC, etc.).
How to connect to android GS
- Install Pixelpilot.
- Copy gs.key to your android device.
- Connect RTL8812AU based WiFi adapter to your android device.
- Open Pixelpilot using popup.
- Press the gear icon. Set up: Channel - 161; Bandwidth - 20.
- Add gs.key. Press the gear icon > press WFB-NG > press gs.key > select gs.key that you copied on stage 2.
- Power on your VTX.
If you don`t see image after 30 seconds, restart Pixelpilot. If even this does not help use this check list.- Check lens cover.
- Check gs.key.
- Power cycle your android device and VTX.
Basic setup summary
After basic setup you will get cheapest modern digital FPV system, but you`ll not see OSD, to setup OSD you need to read advanced setup article. If you want to read instruction from manufacturer, please read this.